It’s easy to use a vacuum sealer, although it takes some practice to get the hang of handling the bags effectively.
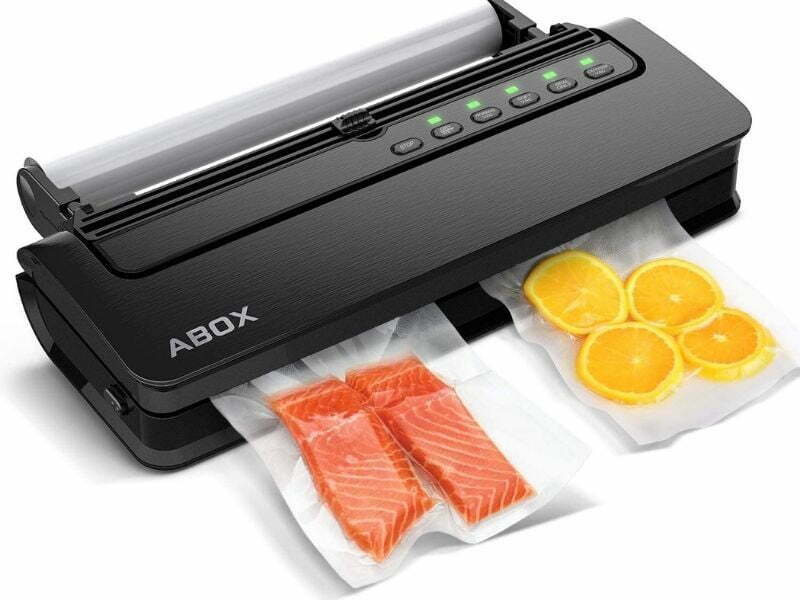
There are two types of vacuum sealers: chamber and external. With an external vacuum sealer, the bag is inserted in the machine with the unsealed end hanging out of a slot in the top. Closing the lid activates the pump, which sucks all of the air out of the bag, and then seals it shut.
Chamber vacuum sealers work by placing a bag inside a chamber that holds all of the air except for what is in the bag itself. The machine then sucks all of that air out as well, before sealing it shut.
What Is A Vacuum Sealer
A vacuum sealer is a kitchen appliance that removes air from food storage bags, creating a partial vacuum within the bag and allowing food to be stored for longer periods of time.
A better airtight seal can help prevent freezer burn. A vacuum sealer is also useful in preventing cross-contamination by ensuring that meats and other foods are kept separate during storage.
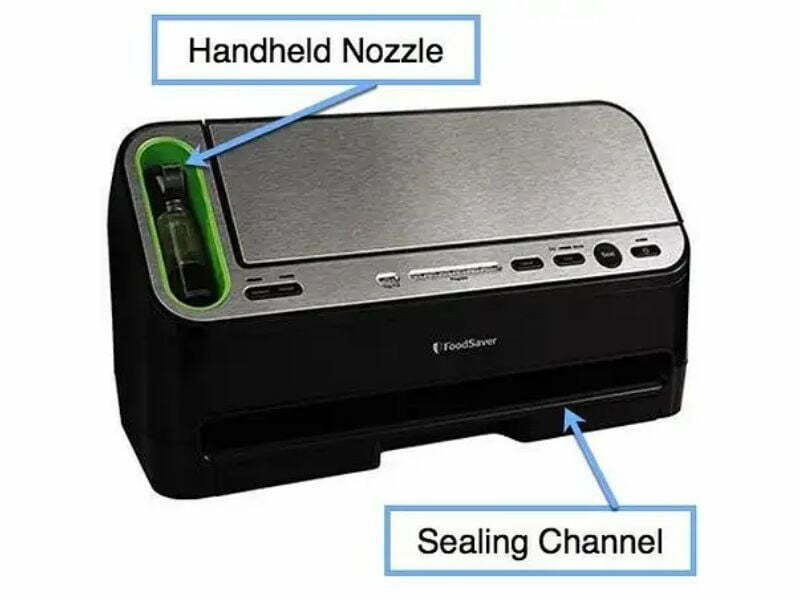
Essentially, a vacuum sealer consists of two parts: a heat sealer and a pump. The heat sealer creates an airtight seal around the opening of the bag, which can then be evacuated using the pump. Before sealing, it is common to insert an oxygen absorber into the bag, which will remove any residual oxygen from inside the bag and further extend the lifetime of products stored within.
Benefits Of Vacuum Sealer
The benefits of vacuum sealing are:
- The protection against freezer burn.
- The ability to keep food fresh twice as long.
- The ability to marinate food in minutes instead of hours or days.
- It keeps dry foods fresh, like coffee and cereals, and is great for sous vide cooking.
- It gives you added room in your refrigerator and freezer by eliminating the need for bulky containers and packaging, so you can buy in bulk when items are on sale and save money!
- It allows you to preserve homemade items in jars and containers, and re-use them later.
- It saves money as you do not have to throw out spoiled food or waste trips to the grocery store.
Difficult To Use A Vacuum Sealer?
Vacuum sealing is one of the most popular ways to store foods for a long time. Vacuum sealers effectively remove the air from the bag that contains the food and seal it in order to prevent any kind of contamination.
However, many people find vacuum sealing quite difficult and complicated. This is mainly because they are not aware of how to use vacuum sealers properly.
If you’re having trouble using a vacuum sealer, then you’ve come to the right place. In this article, we will be discussing some simple steps in order to help you out with using a vacuum sealer properly.
How To Use A Vacuum Sealer
Now, we will explain how to use a vacuum sealer in ten simple steps.
1. Prepare your food for the vacuum sealing process. If you are sealing meat, make sure it is fully cooked before you place it in the bag. Also, it is best if you slice the meat into portions for individual servings. This way you can quickly defrost just the amount of meat you need for one meal.
2. Place the item in a vacuum sealer bag or roll and let about two inches of space between the top of the bag and your food so that there is enough room for the air to be sucked out from around it.
3. Close up one end of your bag as tightly as possible, either with a twist tie or by using a clip or clothespin.
4. Place one open end of the vacuum sealer bag over the suction port on the side of your vacuum sealer machine (see picture below). Make sure that no food is touching the port in any way or it could get stuck inside the machine.
5. Turn your machine on and give the sealer a few minutes to get going, or put the bag into a bowl of water (not too much, as this will make it harder for your machine to suck up the air) until it glides automatically over the suction port.
6. Check to see how much air is inside the bag by pressing all of the air out of it, then you can empty it into your refrigerator or freezer. You can even just eat the bag right away and put the sealer machine away.
7. When you are done sealing your food and storing it in the refrigerator, open one end of the bag with a twist tie or clothespin, pop out your food, then re-seal up the bag as tight as you can.
8. Put your sealer machine back into the bottom of your refrigerator, or leave it out on a counter so that it can get a little warm. You don’t want the leftover heat to ruin your food.
9. Remember to store your vacuum sealer in a dry place, and wash all parts after every use. You should also keep the bag you sealed the most air out at the top of your storage area, and any bags that have been used in the bottom of your shelving system.
10. Always try to keep your vacuum sealer away from any sharp objects. The sealer seals very tightly, so if you put it in the wrong place, it can be damaged and not work properly in the future.
A Few Important Tips
- Always make sure that your food is fully cooked before sealing it in a bag. You don’t want bacteria growing inside of the bag while you are storing the food.
- Always make sure that the freezer has enough space in it before you start storing your food. You don’t want to have to clean out your freezer while your food freezes because it doesn’t have enough room in it.
- Before sealing up the bags of food, always make sure that they are completely dry and airtight. Moisture is a breeding ground for bacteria, so this can help prevent that from happening.
- Never store food and drink in the same bag. You will have to label each bag so you know what is in it, and using two different bags will help eliminate any confusion.
- Make sure that you have sensibly sized bags that can seal tightly around your food to avoid any contamination while it is being stored.
How to Freeze Food with a Vacuum Sealer
If your kitchen is overflowing with produce from your garden or you’re just trying to stock up on sales at the grocery store, freezing food is a great way to preserve it. Freezing won’t make food last indefinitely, but it will add months to its shelf life and lock in flavor.
Vacuum sealing your foods ensures that they won’t get freezer burn, which can ruin their taste and texture. To vacuum seal food for freezing, you’ll want to first choose the right kind of bag or container for your food. Then, divide the food into portions that you can use when you defrost them later on. Pack the prepared containers up and freeze them! When you want to use your frozen food, thaw it in the refrigerator overnight, or just let it sit at room temperature for 15 to 20 minutes before serving.
If you aren’t familiar with vacuum sealing and freezing, the National Center for Home Food Preservation offers information on how to do this safely. It is important to note that some foods don’t freeze well because they contain certain ingredients that make them difficult to freeze. For instance, if you freeze raw flour, it will become a solid block. However, if you mix said flour with oil and water before freezing it, it will keep its texture and can be used when thawed out.
The Vacuum Sealer Is Expensive?
No, not really.
There are expensive vacuum sealers, but there are also cheap ones. Some cost $300, others less than $50.
Also, if you’re buying a vacuum sealer for use at home, it’s most likely that you don’t need an industrial strength or a commercial grade vacuum sealer.
In fact, an expensive vacuum sealer is not always the best buy because it’s loaded with features and technology that you may not use.
Conclusion
Vacuum sealers are a great benefit to any kitchen. They take up little space and provide big benefits. You can save money by buying in bulk and preventing food waste. They are also useful for preparing portions of food to be frozen, which is why they are often used by sous vide chefs.
If you have a vacuum sealer and haven’t used it yet, hopefully, this article has given you the confidence to get started. It’s much easier than it looks!